Sitecore CMS allows setting up several different sites in a single installation.
Sitecore always works in a certain context site. For example, when a user works in the Sitecore client, the context site is set to “shell”. At the same time, the front-end performs in the context of “website” site.
The clean Sitecore installation contains a number of sites configured by default, which are required for proper system work. The configuration settings are stored in the web.config file. The nature of web applications is such that it is not always convenient or even possible to edit the web.config every time you need to add a new web site. You can refer to the Configuring Multiple Sites article for more information on this subject.
Sitecore provides a possibility to add and configure multiple sites from inside the client without editing the web.config file. The Multiple Sites Manager module puts such possibility into practice. A user can easily manage and add custom sites.
1. Installation
The Multiple Sites Manager module is distributed as a standard Sitecore package. Thus to start using it, you should install the package. Please refer to the Installing Modules and Packages article if you are not familiar with the standard Sitecore Packager tool.
The module installs a single DLL into the /bin directory and several content items:
- Three Site Templates under the templates/System/Site templates item.
- Three appropriate masters in the root of the Master area.
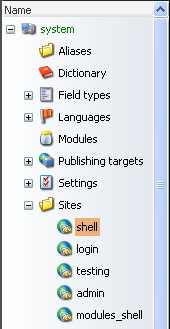
- The Sites folder with the Site Items in the System area.
The detailed description of each of these items is give below.
Modify the web.config file after the package installation.
Add the following processor into the httpRequestBegin pipeline before the standard SiteResolver processor:
<processor type="Sitecore.Sites.MultiSitesManager, MultiSitesManager" />
Change the “item:added” event:
<event name="item:added">
<handler type="Sitecore.Sites.AddSiteProcessor, MultiSitesManager" method="OnSiteAdded" />
</event>
2. General Description
2.1. Site Templates
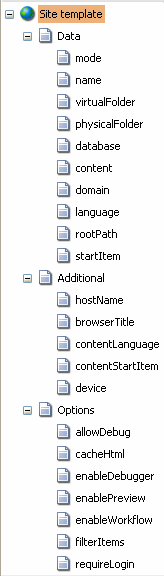
Three templates under the templates/System/Site templates item are added to the client after the package installation: Site Template, Site Attribute Template and the Site Link Template.
Site Template
Site Template represents the Site configuration information. It contains three sections with fields which match the site attributes of the web.config file:
This template is used to create Site Items which represent separate sites.
Site Link Template
The Site link template inherits from the Standard template and has no own fields. The purpose of the Site link Items is to reference the sites which already exist in the web.config.
Site Attribute Template
Site Attribute Template provides a possibility to add custom attributes to a site definition. For example, it’s possible to add the htmlCacheSize attribute to the ‘website’ site. The item based on this template should be a child under the corresponding Site Item.
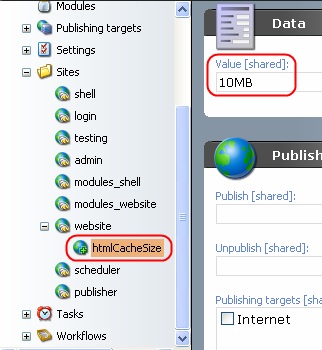
The template contains the only field called Value. The name of the Item serves as the attribute name, and the Value field stands for the attribute value.
2.2. Site Item Folder
All Site Items are located under the system/Sites folder. During the package installation this folder is populated by the Site Link Items.
2.2.1. Site Link Item
The purpose of the Site link Item is to reference the site which already exists in the web.config. Site Link Items are created automatically once the module is installed. If more sites are added to web.config after the module installation, an administrator will have to create appropriate Site Link Items manually.
The order in which the sites stand under the Sites folder is important for the SiteResolver method. The Sortorder field is used to sort the Sites collection. The default order is the same as in the web.config file.
If the site exists in the web.config file but has no appropriate site link, its order is considered to be zero.
If the site name in web.config is changed, the name of the Site Link Item should be changed manually as well.
2.2.2. Adding a New Site
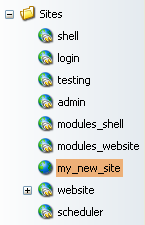
- Select the Sites node, click New and choose New Site
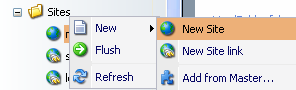
- Enter a name, for example my_new_site. New site definition will be created. The attribute values for this site will be the same as those of the “website” site by default. The site will be placed after all existing sites.
- Fill in the name filed with my_new_site, fill in the startItem field with /My New Site. Create the My New Site Item under sitecore/content and publish the site.
- Sort the newly created site before the “website” site link. The order in which the sites are scanned by SiteResolver is defined by the Sort order field.
- Select the Sites Item (/sitecore/system/Sites) and look at the toolbar. It contains the Flush button
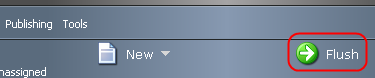
This button tells the system to rebuild (resort) the sites collection in memory according to the recent changes. It is introduced because it is quite a resource consuming operation to rescan the sites subtree all the time.
- Press the Flush button and start the website (http://localhost in our case). You’ll see the My New Site site instead of the default website. This is because the My New Site site is placed before the website in the content tree. Change the site order, press Flush and start the website – you’ll see the default website again.
Now consider a situation when a custom attribute should be added to the site.
Select a site Item in the content tree, click New and choose New site attribute. Provide a name for this Item – it will become the name of the attribute. Provide a value, e.g. 10MB. Click save - the new attribute is added.
3. Architectural Notes
All the sites defined in the web.config file populate the global sites collection. The SiteResolver scans this collection upon each URL request and finds the best matching site.
The solution presented here adds custom sites to the global sites collection and sorts it before the SiteResolver interference. An administrator is responsible for providing the sort order of a site. In case the Sort Order is not specified, its value will be considered as zero.
The order in which the sites are sorted in the content tree takes precedence over the site order in the web.config file.
Below is a brief list of the steps required to implement the Multiple Sites solution:
- Define a “Site Template” that represents the Site configuration information.
- Create a set of “Site” items that define the Site configuration information for each site.
- Create a new project (class library).
- Create a new class with a Process() method which reads sites from the content tree and adds them into the global sites collection (SiteContextFactory.Sites).
- Add a new <processor> definition for the newly created class into the <httpRequestBegin> section of the web.config file. The new <processor> definition should be placed before the
<processor type="Sitecore.Pipelines.HttpRequest.SiteResolver, Sitecore.Kernel" />
definition.
4. Troubleshooting
It is recommended to place custom sites after shell and login site link items in the content tree; otherwise, you may experience problems when connecting to Sitecore Shell. If this happens and you cannot enter Sitecore Shell, just go to the web.config and comment out the following processor:
<httpRequestBegin>
<!-- <processor type="Sitecore.Sites.MultiSitesManager, MultiSitesManager" /> -->